How to Email Phone Call Transcripts with Twilio Studio and Pipedream
Learn how to build a workflow that allows people to call & leave a message that will automatically be transcribed and emailed, using Twilio Studio, Pipedream, and Deepgram.
Full disclosure: I never check my voicemail. I assume if what you need is pressing enough you’ll call back or send me a text message. But maybe there are times I’d want to know who called and what they needed. In that case, I need to receive that information in one of the channels I normally check, like email.
So I built a workflow that allows people to call and leave me a message that will automatically be transcribed and emailed to me. This tutorial will show you how to build the same workflow using Twilio Studio, Pipedream, and Deepgram.
How It Works
First, we’ll create a Twilio Studio Flow that will handle all calls to a Twilio Voice number. That Flow will ask the caller to leave a message, then send the recording to Deepgram for transcription. Twilio Studio is a low-code workflow builder that allows you to build workflows that connect to Twilio’s APIs and other third-party APIs.
Once the transcription is complete, Twilio will send a webhook to a Pipedream workflow with information about the transcription. Pipedream is a low-code integration platform that allows you to build workflows that connect to hundreds of third-party APIs.
Pipedream will make a request to the Twilio API to get the actual transcription, format it, and send it to my email address. Then, we can use the transcription to respond to the caller.
Prerequisites
Before we get started, make sure you have the following:
- A Twilio account. Sign up for a free account here.
- A Twilio phone number. You can get one here.
- A Pipedream account. Sign up for a free account here.
Creating a Twilio Studio Flow
First, let’s create a Twilio Studio Flow that will trigger when a call is received. This Flow will ask the caller to leave a message, then send the recording to Deepgram for transcription. The name of your Flow doesn’t matter. I named mine “Transcribe Voicemail.”

In the next prompt, choose the “Start from scratch” option and press the “Next” button. This will create a blank Flow.

Play a Message when a Call is Received
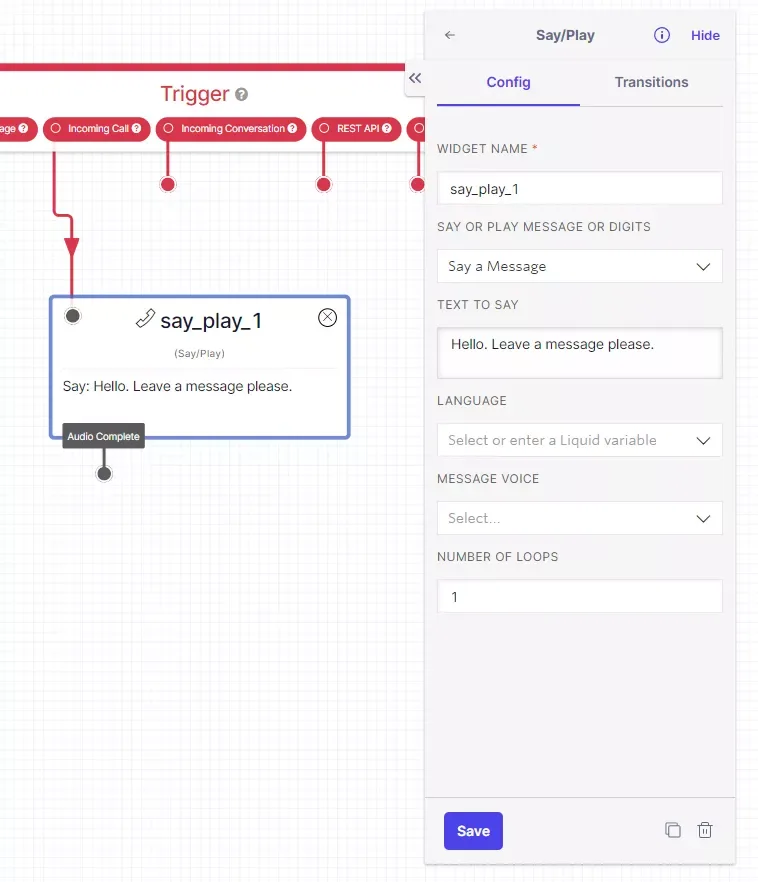
Now that we have a new Flow, let’s add a widget to prompt the caller to leave a message. In the widget library, click and drag the “Say/Play” widget into the Flow. Be sure to connect the “Incoming Call” trigger to the new widget.
Next click on the “say_play_1” widget in your Flow and change the “Text to Say” field to “Hello. Leave a message please.” Then click the “Save” button. At this point, your Flow should look like this:
Record the Callers Message
Now that we’ve prompted the caller to leave a message, let’s add a widget to record the caller’s message. In the widget library, click and drag the “Record Voicemail” widget into the Flow. Be sure to connect the “Say/Play” widget’s “Audio Complete” output to the new widget.
Next click on the “record_voicemail_1” widget in your Flow and change the “Trim” field to “Trim silence” and the “Play Beep” field to “True”. This will remove silence at the beginning and end of the recording and provide a beep prompt for the caller to begin speaking. Click the “Save” button. At this point, your Flow should look like this:

Configuring Your Twilio Phone Number
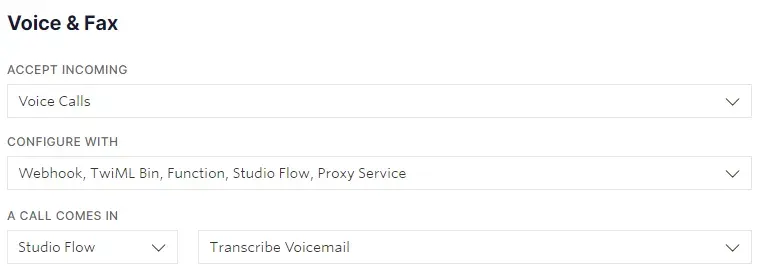
The Flow now has everything it needs to record a caller’s message. But we need to configure our Twilio phone number to use this Flow. In the Twilio console, click on the “Phone Numbers” link in the left sidebar. Then click on the phone number you want to use for this Flow.
In the “Voice & Fax” section, click on the “A Call Comes In” dropdown and choose “Studio Flow”. Then choose your newly created Flow and click the “Save” button.
Creating a Pipedream Workflow
Before we can configure the Deepgram add-on for Twilio, we need to create a Pipedream workflow that will handle the webhook from Twilio. Create a new workflow by clicking on the “New Workflow” button in the top right corner of the Pipedream dashboard.
Triggering the Workflow
Our trigger will be a webhook from Twilio, so choose “HTTP / Webhook” from the list of triggers. Then choose “HTTP Requests with a Body” from the list of options.
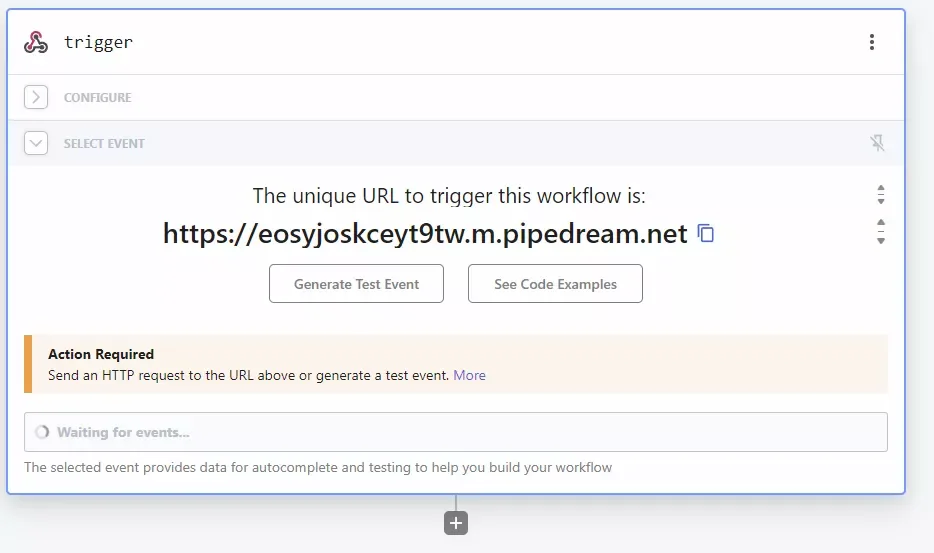
Finally, press the “Save and continue” button. This will add the trigger to the workflow and display a webhook URL. Copy this URL and we’ll return to our Twilio Console to enable the Deepgram add-on.

Enabling the Deepgram Addon for Twilio
Back in the Twilio Console, click on the “Add-ons” link in the left sidebar. There are two Deepgram transcription add-ons; “Deepgram Base Transcription” and “Deepgram Enhanced Transcription”. Let’s enable the “Deepgram Enhanced Transcription” add-on by clicking on it and pressing the “Install” button.
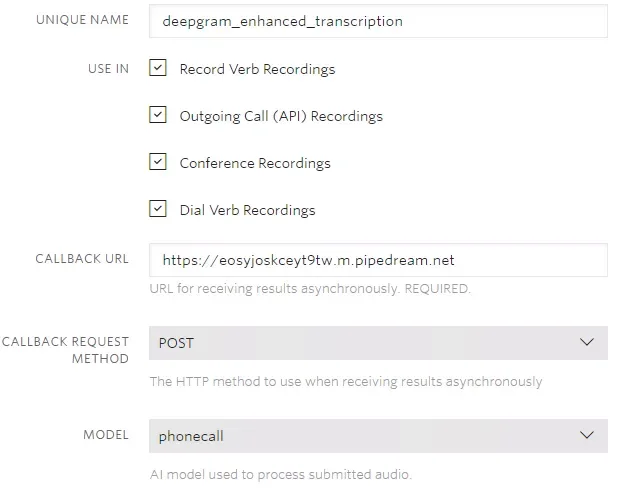
On the “Configure” tab, make the following configurations:
- Ensure the “Unique Name” is
deepgram_enhanced_transcription - Check each option under “Use In”
- Paste the webhook URL from Pipedream into the “Callback URL” field
- Choose “POST” from the “Callback Request Method” dropdown
Finally, click the “Save” button. Your configuration should look like this:
Testing the Webhook Trigger
We can’t continue building out our Pipedream workflow until we know what type of data we’ll receive from Twilio. Place a call to your Twilio phone number and leave a message. Then open the Pipedream workflow. You should see a new event in the “Results” section of the webhook trigger. Click on the event to view the data.
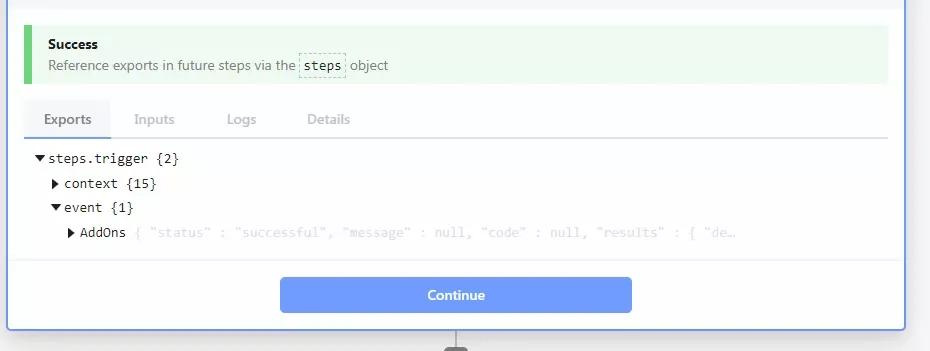
Parsing the Webhook Payload
The event property of the webhook has an AddOns property that contains metadata about any Twilio Add-Ons that were executed, including our deepgram_enhanced_transcription add-on. However, that property is a string containing JSON data. We’ll need to parse that string into a JavaScript object so we can access it.
Add a new step to the workflow and choose “Node” from the list of actions. Then choose the “Run Node code” option. This will add a new step to the workflow and display a code editor. Replace the code in the editor with the following:
export default defineComponent({ async run({ steps, $ }) { const addOnData = JSON.parse(steps.trigger.event.AddOns) return addOnData },})This code will parse the AddOns property of the webhook payload and return the resulting JavaScript object. Click the “Test” button to save the step. At this point, your workflow should look like this:

Requesting the Transcription Data
With our webhook payload parsed into a JavaScript object, we can see that Twilio doesn’t send back our transcription with the webhook. Instead, it provides a URL where we can request the transcription data. Let’s add a new step to our workflow that will request the transcription data from Twilio.
Click on the “Add a step” button and choose “Send any HTTP Request” from the list of actions. Then choose “Make an HTTP Request” from the list of options. This will add a new step to the workflow and display a form for configuring the HTTP request.
This will be a “GET” request. The URL will come from the previous step so we’ll need to add some Pipedream magic to get data from a previous step. In the request URL field, enter {{steps.node.$return_value.results.deepgram_enhanced_transcription.payload[0].url}}. This will use the Pipedream $return_value magic variable to get the return value of the previous step and then access the url property of the deepgram_enhanced_transcription add-on.
Requests to the Twilio API must be authenticated. In the “Authentication” section, choose “Basic Auth” from the “Authentication Type” dropdown. Then enter your Twilio Account SID in the “Username” field and Auth Token in the “Password” field.
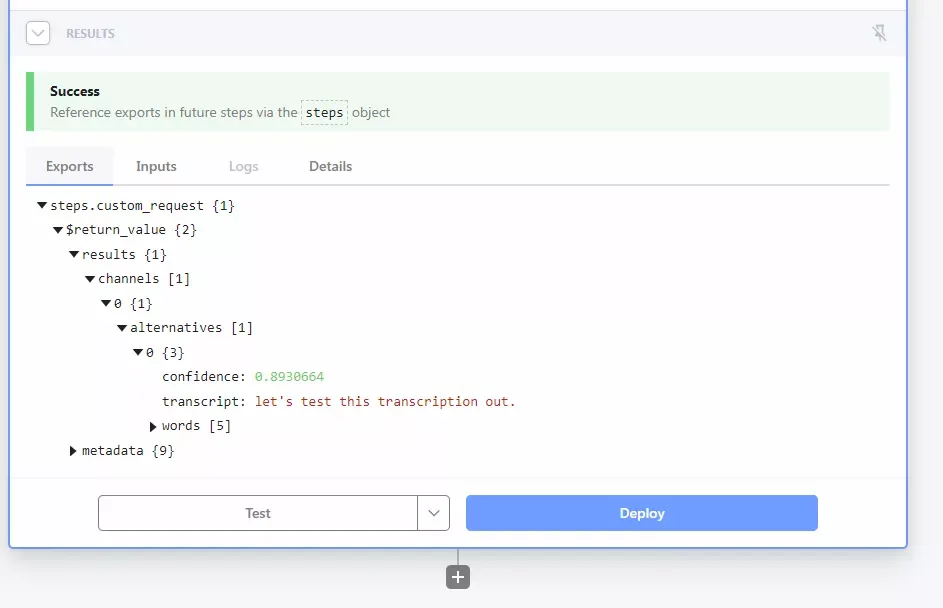
Then press the “Test” button to save the step. After that request returns, you should see the Deepgram transcription results in the “Results” section of the step.
Sending the Transcript as an Email
Now that we have the transcript, we can email ourselves a copy. Add a new step to the workflow and choose “Send Email” from the list of actions. This will add a new step to the workflow and display a form for configuring the email.
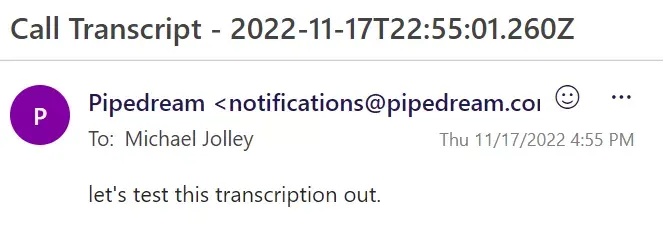
You can choose whatever you’d like as the “Subject”. I chose Call Transcript - {{steps.trigger.context.ts}}. This will use the Pipedream context magic variable to get the timestamp of the call.
The “Body” of the email will be the transcript. Enter {{steps.custom_request.$return_value.results.channels[0].alternatives[0].transcript}} in the “Body” field. This will use the Pipedream $return_value magic variable to get the return value of the previous step and then access the transcript property.
Press the “Test” button to save the step. You should receive an email to the email address associated with your Pipedream account with the transcript included.
Conclusion
In this tutorial, we built a workflow that will transcribe voicemails and email them to us. We used Twilio to receive the voicemail, Deepgram to transcribe it, and Pipedream to send the email. It’s always fun mashing up APIs to create new functionality. I hope you enjoyed this tutorial and found it useful.