Using Azure File Storage as Container Volume Mounts in App Services
How to mount Azure File Storage as a persistent volume in your multi-container App Services.
Need to scale your app? Put it in a container. Need more resiliency? Put it in a container. Code starting to smell? Put it in a container. Want some lunch? Put it in a container.
Okay. Containerization is pretty great, but once you start dealing with saving data and/or files you realize you need to add volumes to the mix. Docker volumes provide access to external resources, such as storage, in a way that seems local to the container. Mapping a local drive on the host to the container is as simple as adding a line or two to a docker-compose.yml file.
But what happens when you move to the cloud? Specifically, let’s talk about Azure. If you’ve got files to save in Azure, you’re probably using Azure Storage. Azure Storage provides a number of great features at a very competitive price, but how can we access those files within a container running in an Azure App Service? Read on to learn.
Azure File Storage
First, let’s setup Azure File Storage. If you already have File Storage you’d like to use, then skip to the next section.
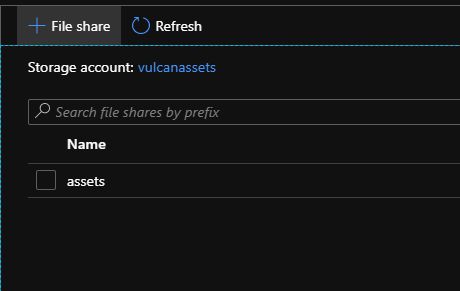
From your Azure Portal, add a new Storage Account. In your Storage Account, click on the “File shares” blade. Then press the ”+ File Share” button at the top. Choose a name for your file share and press “Create.”
Configuring Your Azure App Service

We’ll assume you already have an Azure App Service you’re ready to configure.
In your App Service, click on the “Configuration” blade. Then click the “Path mappings” tab. Under path mappings you can click the ”+ New Azure Storage Mount” option.
Let’s review the “New Azure Storage Mount” interface.

Name is important. This is the name you’ll use to reference this mount later in your docker-compose.yml
For our purposes, we’ll use the Basic Configuration option.
Choose your existing Storage Account where your file share lives.
For Storage Type, select “Azure Files” and then select the file share you previously created as the Storage container.
Mount path is the path within your file share that you’d like to mount. If you want to mount the entire file share, enter ”/”. Otherwise, specify the directory path you’d like to mount.
Finally, press the “Ok” button to setup your storage mount.
Tell Docker About It
Our final step is to configure our docker-compose.yml to tell our container how to use this storage mount as a volume.
You need to add a “volumes” property under the service needing the mount. The volumes property is a list in the following format: {mount name provided above}:{path within the container}.
So if you had a service named “web” and you had created a storage mount named “data,” your docker-compose.yml might look like the following:
version: "3.7"
services:    web:        image: wordpress        container_name: web-wordpress        init: true        restart: always        ports:            - "80:80"        volumes:            - data:/var/www/html
Wrap It Up
Azure has made this a fairly straight-forward process, but finding this information was extremely painful. No Google-Fu produced the answers so I knew I needed to write this down to remember it next time.
Have some feedback or questions? Leave a comment or find me on Twitch several days a week at https://twitch.tv/BaldBeardedBuilder.